 Pin it
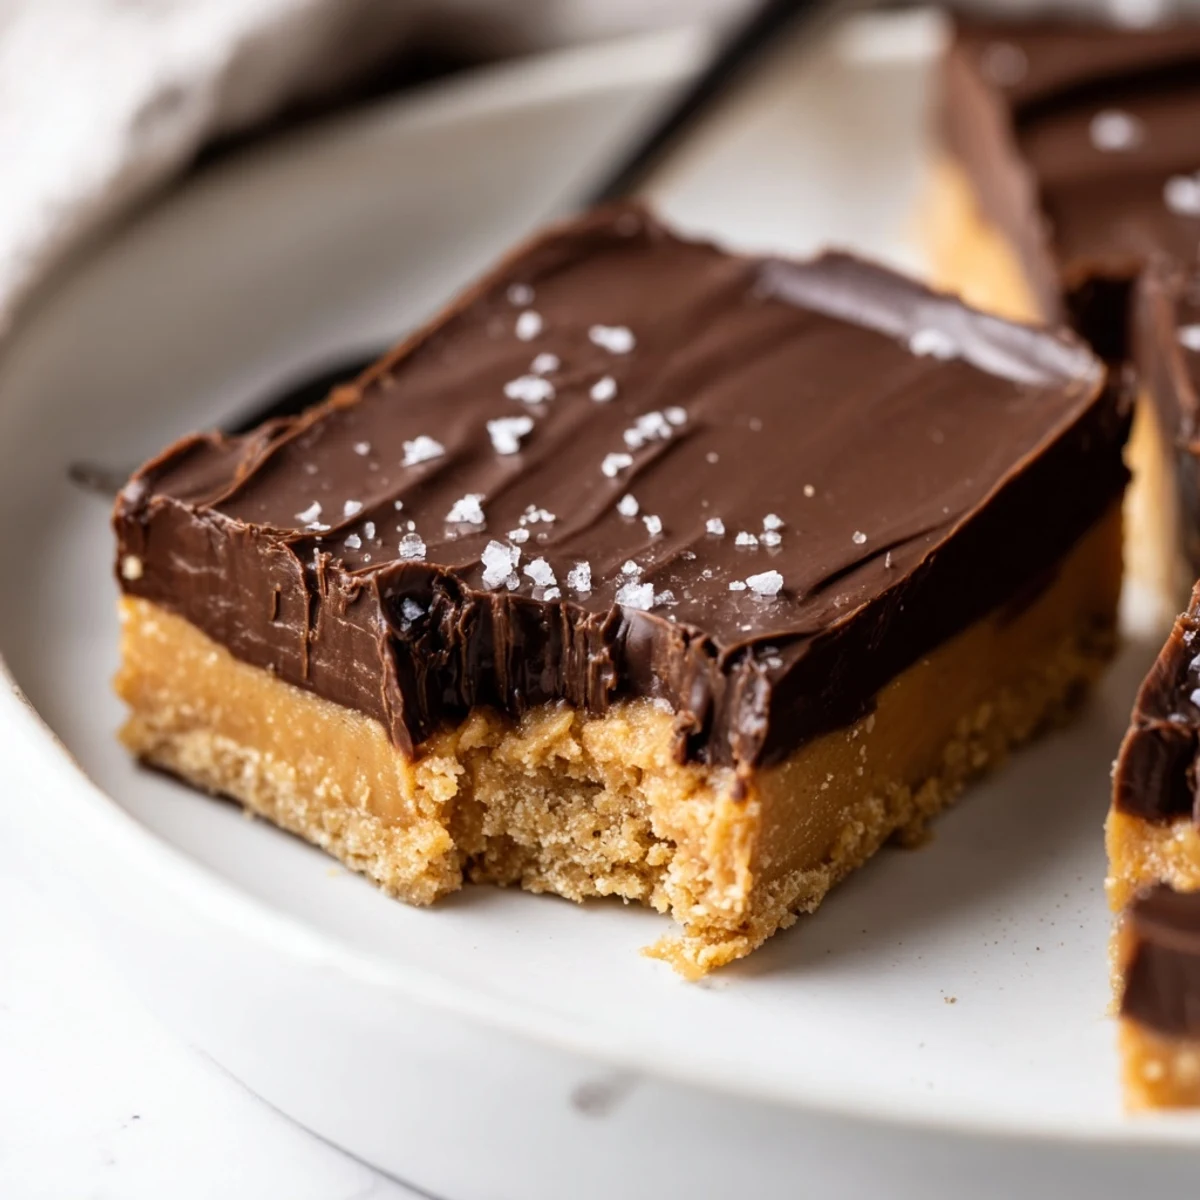
 These no-bake peanut butter bars start with a creamy peanut butter and melted butter base mixed with powdered sugar and graham crumbs, pressed into an 8×8 pan. A melted semi‑sweet chocolate and peanut butter topping is spread over the base, then chilled for at least 2 hours until firm. Slice into 16 bars; store chilled up to 1 week. Variations: use chunky peanut butter, add chopped roasted peanuts or a pinch of sea salt.
The day I finally tried making no bake peanut butter bars was a sticky summer afternoon when using the oven just wasn’t an option. The clatter of bowls and the heady, nutty perfume of peanut butter carried through the kitchen. I kept licking the spoon, much to my own amusement—there was something carefree about indulging before the dessert was even finished. These bars came together so quickly, it felt almost like cheating.
I made a batch for a friend’s game night, and everyone ended up hovering near the fridge, taking slivers before they could fully chill. We laughed about our lack of patience, but no one complained when their fingers got a little chocolatey. To this day, it’s the dessert that never actually lasts long in my house.
Ingredients
- Creamy peanut butter: This is the backbone—smooth peanut butter gives the bars an irresistible texture, but I’ve learned a half-scrape of the jar loosens up any stubborn bits.
- Unsalted butter, melted: Butter leads to richness, and the key is letting it cool just a hair so it blends cleanly with the peanut butter.
- Powdered sugar: It sweetens and thickens—sift if clumpy, trust me, your base will be far smoother.
- Graham cracker crumbs (or digestive biscuit crumbs): Crumbs make the base satisfyingly firm; a quick pulse in the blender helps if you’re working from whole crackers.
- Vanilla extract: Adds a gentle warmth; a little goes a long way, and that extra half teaspoon once made mine too strong.
- Semi-sweet chocolate chips: These melt easily and offer just the right depth—don’t overheat them, though, or they’ll seize up.
- Peanut butter (for topping): Mixing a bit into the chocolate makes it glossier and easier to slice later; I found this out after one too many shattered chocolate tops.
Instructions
- Prep the pan:
- Line your pan with parchment, leaving an overhang so you can lift the bars out—greasy hands are worth it for this step.
- Mix the base:
- Stir melted butter with peanut butter in a big bowl until gleaming and smooth, then add powdered sugar and graham crumbs until everything forms a thick, sticky dough.
- Add vanilla magic:
- Stir in the vanilla extract; use your nose—it’ll smell balanced when you’ve got it just right.
- Press and smooth:
- Scoop the dough into your lined pan and press down firmly, nimbly smoothing the top with a spatula or the back of a spoon.
- Melt the topping:
- Microwave chocolate chips with peanut butter in 30-second bursts, stirring each time, until shiny and lump-free.
- Spread the love:
- Pour chocolate mixture over the base and smooth out; try tilting the pan for a perfectly even sheet.
- Chill out:
- Refrigerate the pan for at least two hours—patience brings perfectly set bars that cut cleanly.
- Slice and share:
- Lift by parchment, slice into bars, and don’t be surprised if little hands reach in before you’re done cutting.
 Pin it
 One afternoon, my little niece dusted everything—including the dog—with powdered sugar, but the giggles and sticky hands were worth every vacuumed corner. Those shared messy moments made this recipe so much more than a quick dessert.
Adapting for Everyone
Swapping out graham crackers for gluten-free biscuits means no one’s left out. I’ve even been tempted to stir a few mini marshmallows into the base for an extra twist, and it’s always met with excitement.
Make-Ahead and Storage
These bars are magic for busy schedules since you can make them ahead and stash them in the fridge for up to a week. I sometimes cut them up front and hide extras at the back—otherwise, a whole pan never lasts through the weekend.
When Things Go Wrong (and How to Fix It)
Once, my chocolate seized because I rushed the microwave—stir slowly and be patient. If the base seems too soft, a bit more graham crumbs firms it up without losing flavor. Small tweaks save the day more often than not.
- Use parchment for easy pan removal every time.
- Add a pinch of flaky sea salt to wake up the flavors.
- Let bars come to room temp for a few minutes before slicing.
 Pin it
 Whether for a party, quick craving, or just a sweet bite with coffee, these peanut butter bars have a way of bringing smiles. Sharing a plate of them rarely lasts long—so I recommend doubling up.
Recipe Questions & Answers
- → Can I use crunchy peanut butter?
-
Yes—using crunchy or chunky peanut butter adds pleasant texture. You can also fold in chopped roasted peanuts into the base for extra crunch.
- → How should I melt the chocolate topping without it seizing?
-
Melt in 30-second intervals in the microwave, stirring between bursts, or use a double boiler over low heat. Keep it gentle and stir often; a teaspoon of oil or extra peanut butter can smooth a slightly seized batch.
- → What can I substitute for graham cracker crumbs?
-
Gluten-free cookies, digestive biscuits, or finely ground oats are good alternatives. Adjust the powdered sugar a bit if the substitute is drier to maintain a firm base.
- → Can these bars be frozen?
-
Yes—wrap individual slices tightly in plastic and foil or an airtight container and freeze up to 1 month. Thaw in the refrigerator before serving for best texture.
- → How do I get clean, neat slices?
-
Chill the slab thoroughly until fully set. Use a sharp knife warmed under hot water, wipe it dry between cuts, and press straight down for clean edges.
- → Any tips to boost flavor?
-
Sprinkle flaky sea salt on top to balance sweetness, use high-quality semi‑sweet chocolate, or add a pinch of espresso powder to the chocolate for deeper flavor notes.