 Pin it
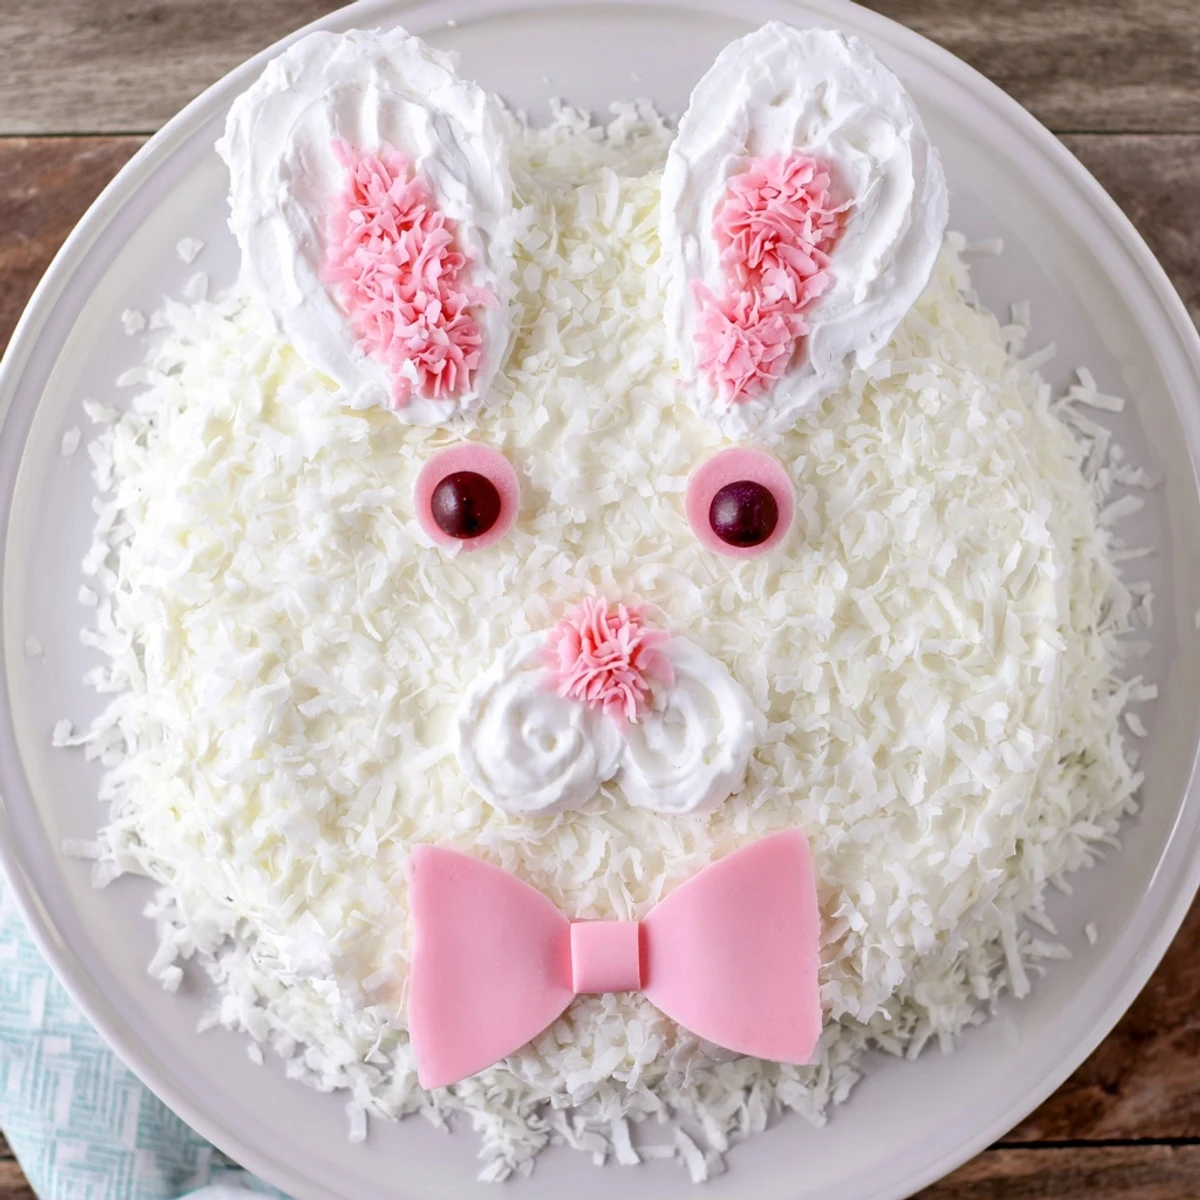
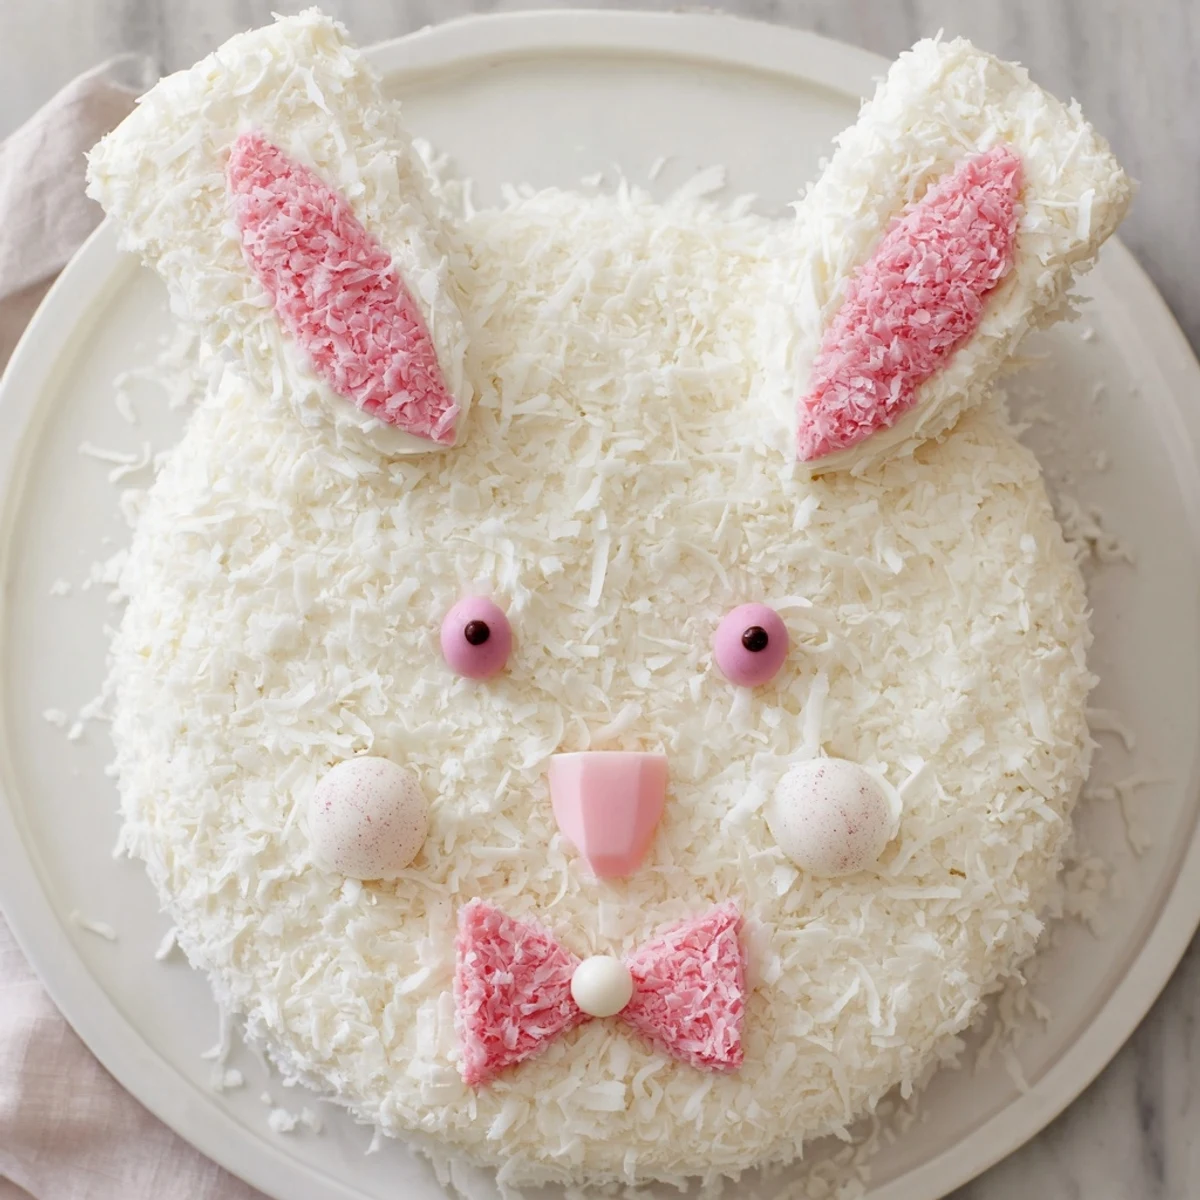
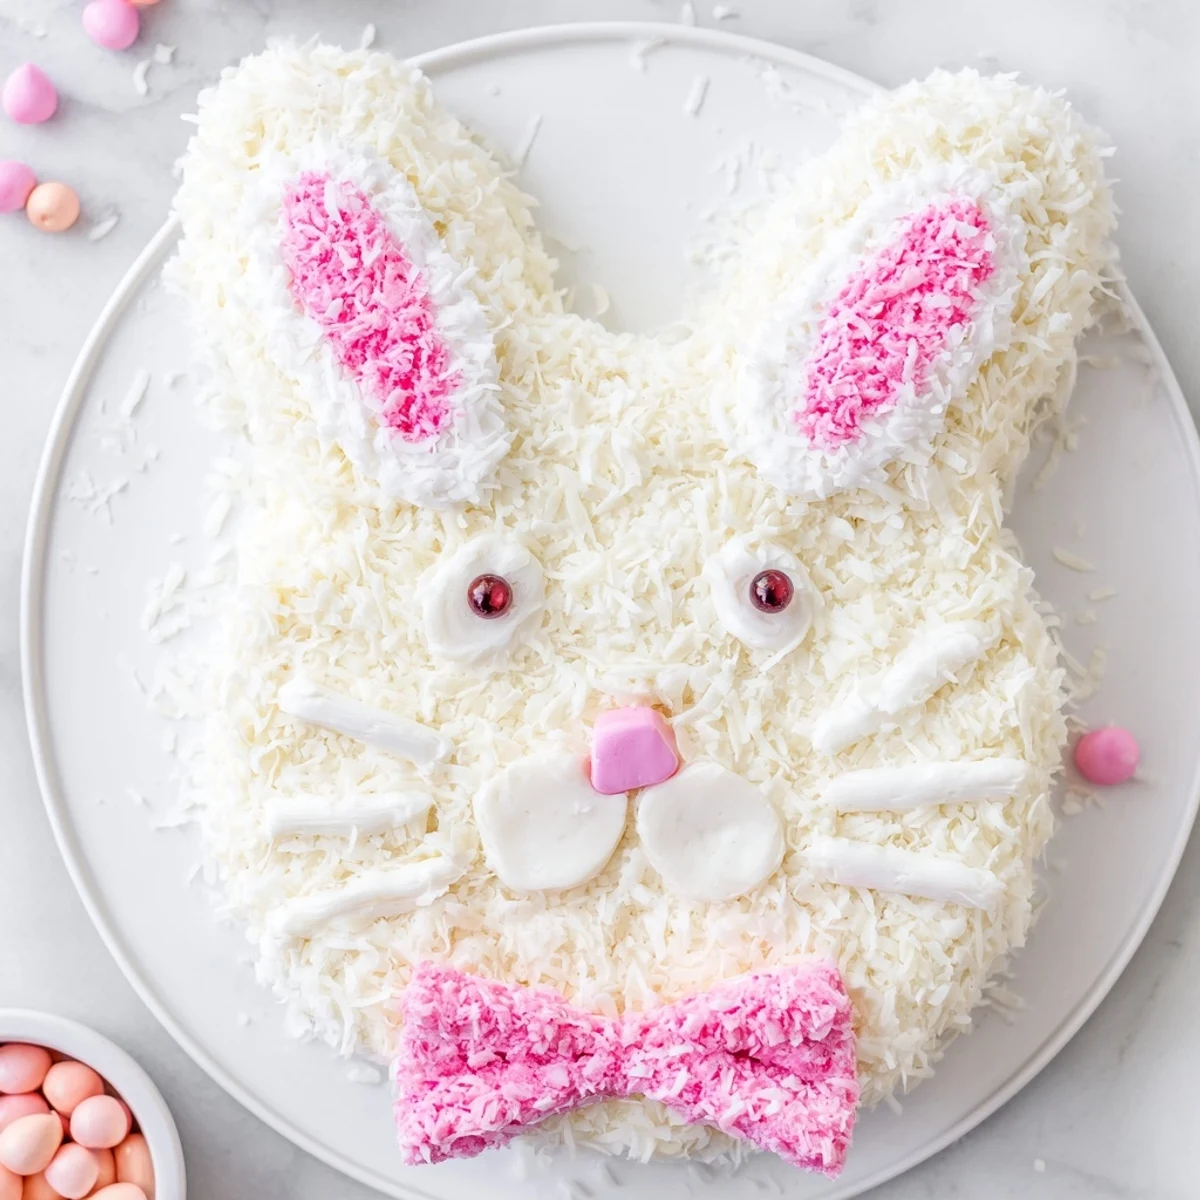
 This delightful bunny-shaped dessert starts with two moist vanilla cakes baked in round pans. One cake forms the face while the second is cleverly cut into floppy ears and a bow tie. The entire creation gets coated in creamy vanilla buttercream and rolled in shredded coconut for that signature fluffy fur effect. Pink-tinted coconut accents the inner ears, while candy eyes and jelly bean noses bring your bunny to life. The result is an irresistible centerpiece that captures the joy of spring celebrations and Easter gatherings.
The kitchen smelled like vanilla and possibility when my daughter begged me to make a bunny cake for her third birthday. I had zero experience shaping cakes into animals, but her excitement was impossible to resist. We ended up with a lopsided bunny that made everyone laugh harder than any perfect dessert could have. That imperfect cake started our spring tradition.
Last spring I made three of these cakes in one weekend for different family gatherings. By the third bunny I had learned that the ears always slide if you skip the chilling step. My sister now requests this cake every Easter and claims the bow tie piece is the best part because it gets the most frosting.
Ingredients
- All-purpose flour: The foundation that gives the cake structure while staying tender enough to cut into shapes
- Unsalted butter: Room temperature butter creates the creamy base for both cake and frosting
- Granulated sugar: Sweetens the cake while helping create a light crumb through proper creaming
- Baking powder and baking soda: The leavening duo that ensures the cake rises properly for easy cutting
- Salt: A crucial pinch that balances sweetness and enhances overall flavor
- Large eggs: Bind everything together while adding richness and structure
- Whole milk: Creates moisture and tenderness in every bite
- Vanilla extract: Pure vanilla makes the classic flavor shine through the sweet frosting
- Powdered sugar: Sifted sugar creates silky smooth frosting without any grainy texture
- Sweetened shredded coconut: The magical coating that looks like fluffy bunny fur
- Pink food coloring: Just a drop turns plain coconut into the perfect inner ear color
- Jelly beans or mini candies: Bring your bunny to life with eyes and a cute nose
- Pink and white fondant: Shape these into floppy ears that stay upright all day
Instructions
- Prepare your oven and pans:
- Preheat oven to 350°F (175°C) and grease two 8-inch round cake pans thoroughly with butter and flour
- Whisk the dry ingredients:
- In a medium bowl combine flour, baking powder, baking soda, and salt until well blended
- Cream butter and sugar:
- Beat butter and sugar in a large bowl until light and fluffy then add eggs one at a time
- Combine everything:
- Alternate adding flour mixture and milk starting and ending with flour then stir in vanilla
- Bake the layers:
- Divide batter between pans and bake 22 to 25 minutes until a toothpick comes out clean
- Cool completely:
- Let cakes rest 10 minutes in pans then turn onto wire racks to cool entirely before shaping
- Make the frosting:
- Beat butter until smooth then gradually add powdered sugar vanilla salt and enough milk for spreading
- Shape your bunny:
- Keep one cake whole for the face then cut the second into two ear ovals and a center bow tie
- Arrange the pieces:
- Position face ears and bow tie on a large serving tray before applying any frosting
- Add the crumb coat:
- Spread a thin layer of frosting over all pieces then chill 20 minutes to lock in crumbs
- Apply coconut fur:
- Frost fully then press shredded coconut generously over the entire surface for fluffy texture
- Create pink ears:
- Tint a small amount of coconut with pink food coloring and gently press onto ear centers
- Add the face:
- Use fondant for ears and place candies for nose eyes and whiskers to complete your bunny
 Pin it
 My niece asked if the bunny cake could sleep on the counter overnight. The next morning she was delighted to find him still there. That moment when dessert becomes part of the celebration magic is exactly why I keep making this recipe.
Getting the Shape Right
The most nerve wracking part is cutting that second cake round without destroying it. I use a serrated knife and make slow gentle cuts. If a piece breaks just press it back together with frosting. The coconut hides all your mistakes anyway.
Making It Your Own
One year we made a chocolate bunny cake and it was just as adorable. You can also use store bought frosting if time is tight. The coconut and face decorations do all the heavy lifting for the cute factor.
Serving and Storage
This cake travels surprisingly well if you have a large flat board. Serve it with something light like sparkling lemonade to balance the sweetness.
- Keep the cake covered at room temperature for up to 2 days
- Refrigerate for longer storage but bring to room temperature before serving
- The coconut texture is best on the first day but still tastes great later
 Pin it
 Watch how quickly this bunny disappears at your next spring gathering. The joy it brings is worth every minute of shaping and frosting.
Recipe Questions & Answers
- → How far in advance can I make this bunny cake?
-
You can bake the vanilla cake layers up to 2 days ahead. Wrap cooled cakes tightly in plastic wrap and store at room temperature. The buttercream frosting can be prepared 1-2 days in advance and refrigerated. For best results, assemble and decorate the bunny cake within 24 hours of serving to maintain the fluffy texture and fresh appearance.
- → Can I use cake mix instead of homemade vanilla cake?
-
Absolutely! A boxed vanilla cake mix works perfectly as a time-saving alternative. Prepare according to package instructions for two 8-inch round cakes. The flavor will still be delicious, and the coconut-covered exterior provides plenty of homemade charm. Most people won't notice the difference once decorated.
- → What's the best way to cut the bunny ears from the second cake?
-
Cut the second round cake in half vertically, then trim each half into an oval shape for long bunny ears. The remaining center section becomes the bow tie. Use a serrated knife for clean cuts through the cake. If any pieces crumble slightly, the buttercream and coconut will hide imperfections beautifully.
- → How do I transport a bunny cake without damaging the decorations?
-
Place the assembled cake on a sturdy cardboard cake board slightly larger than your bunny design. Use a large flat box or cake carrier with non-slip mat underneath. Drive carefully and keep the cake level. If possible, place the box on your car's floor rather than a seat to minimize movement during transport.
- → Can I freeze the bunny cake for later?
-
Yes, you can freeze the undecorated cake layers for up to 3 months. Wrap each cooled cake layer separately in plastic wrap, then foil. Thaw overnight at room temperature before frosting and shaping. The fully assembled coconut-covered cake freezes less successfully due to texture changes in the buttercream and coconut.