 Pin it
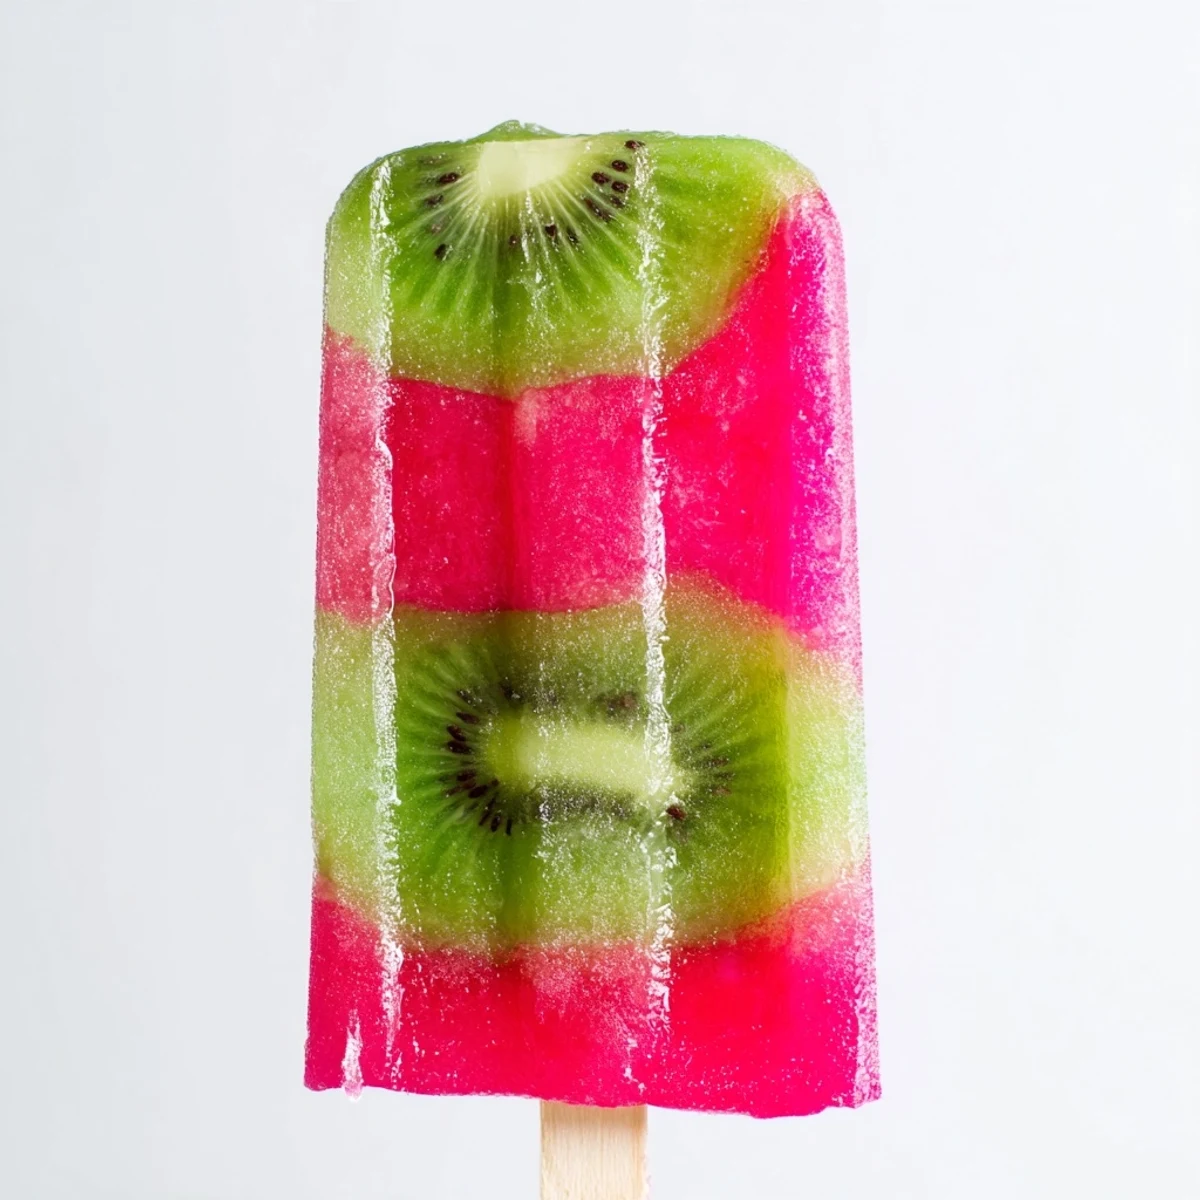
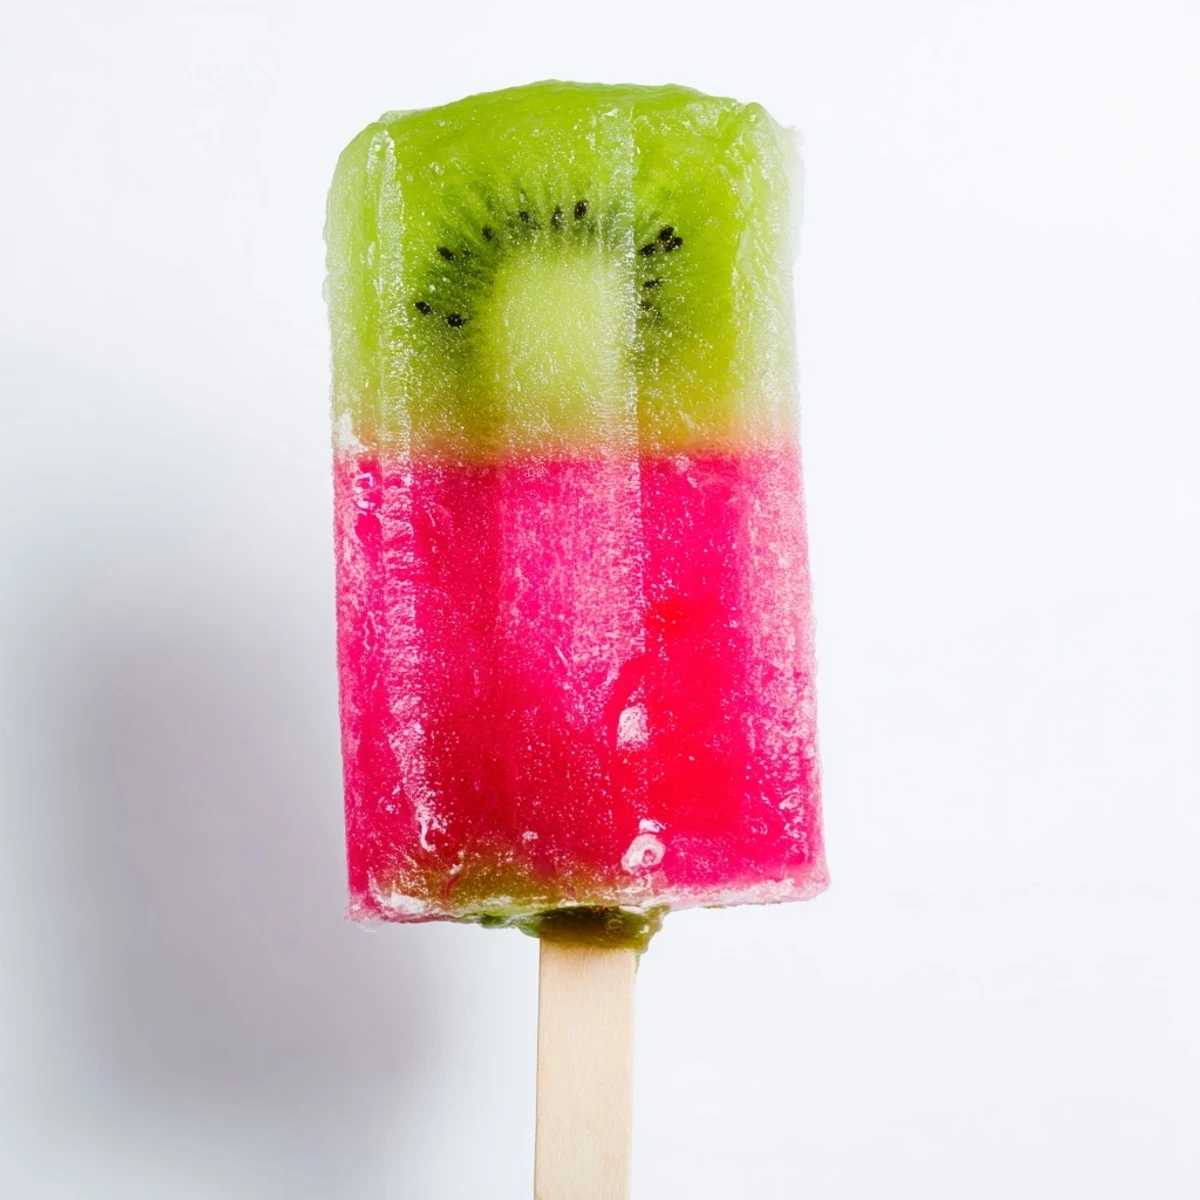
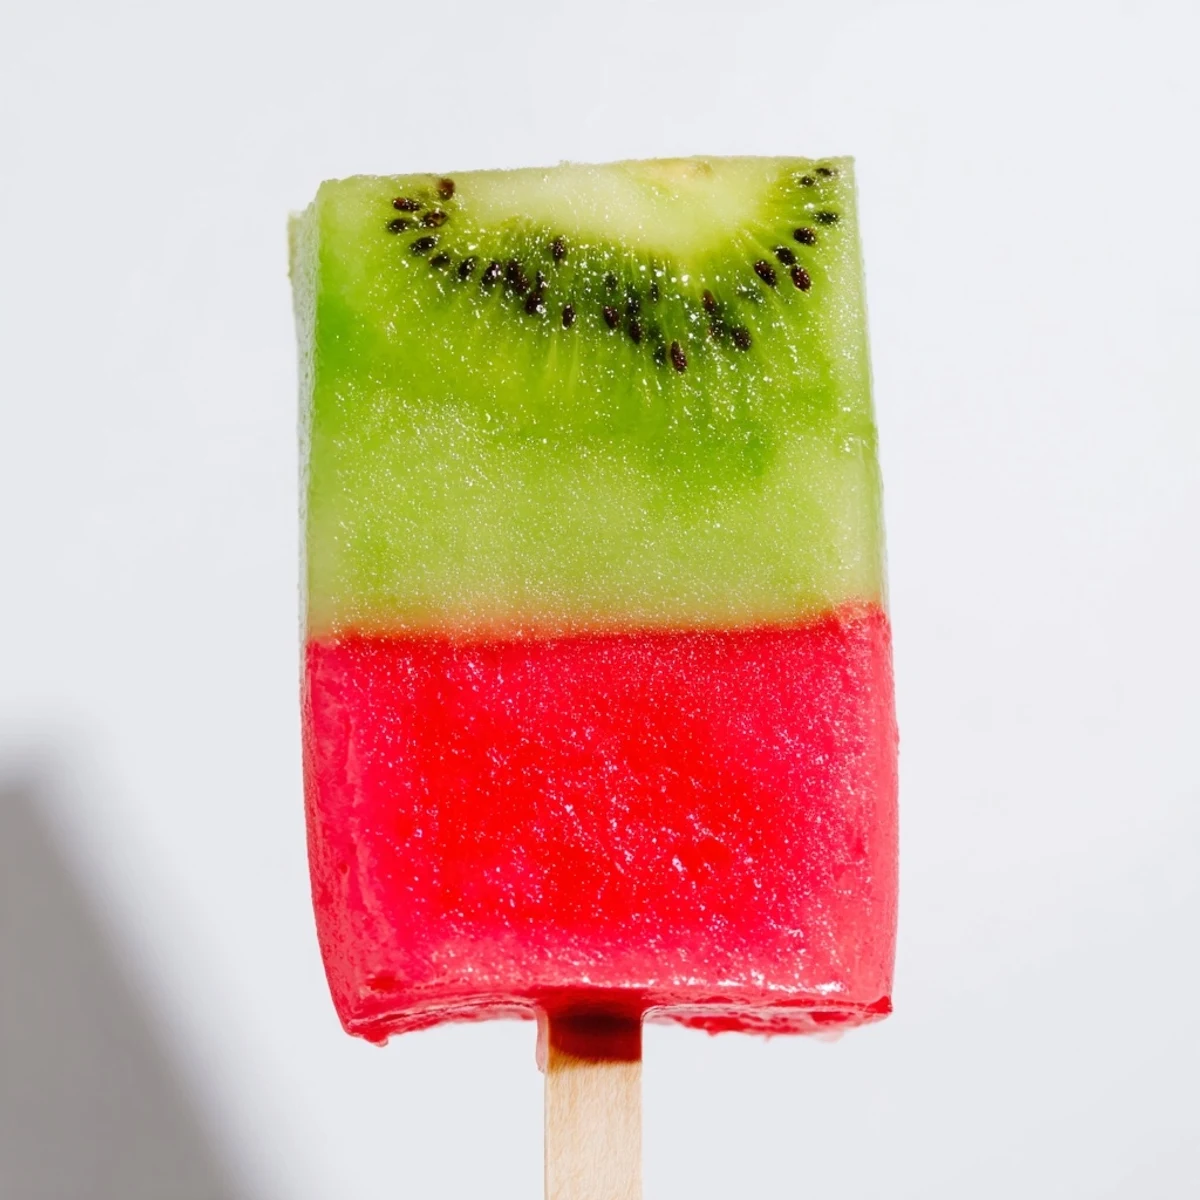
 These vibrant two-layer frozen treats combine sweet seedless watermelon with tangy kiwi for a refreshing summer dessert. The natural fruit purées create beautiful color layers that freeze into perfectly portioned handheld treats.
Simply blend each fruit layer separately, freeze the watermelon base first until slightly firm, then top with kiwi purée before freezing completely. The result is a stunning ombre effect that tastes as fresh as it looks.
Customize sweetness with your preferred natural sweetener, add fresh mint for an herbal twist, or incorporate diced fruit for extra texture. These dairy-free, vegan treats are naturally gluten-free and ready in just 20 minutes of active prep time.
August in my tiny apartment meant the oven stayed off and the blender worked overtime. One particularly brutal afternoon, with the fan just pushing hot air around, I spotted a watermelon and a few kiwis sitting on the counter looking like they were plotting something beautiful together. I had popsicle molds buried in a cabinet from a failed smoothie experiment, and something told me this time would be different. Those frozen layers of ruby red and emerald green became my most repeated recipe that entire summer.
I brought a batch of these to a rooftop gathering and watched a six year old choose one over a store bought ice cream bar without any persuasion. That silent thumbs up from a kid with green juice dripping down her chin was all the validation I needed.
Ingredients
- Seedless watermelon (3 cups cubed): Pick a melon that feels heavy for its size and has a creamy yellow spot on the bottom, which tells you it ripened in the field.
- Fresh lime juice (2 tablespoons for watermelon, 1 tablespoon for kiwi): Bottled juice will flatten the flavor, so squeeze it fresh right before blending.
- Agave syrup or honey (1 to 2 tablespoons for watermelon, 1 tablespoon for kiwi, optional): Taste your fruit first because ripe watermelon often needs no help in the sweetness department.
- Ripe kiwis (3, peeled and sliced): Gently press them and if they yield slightly like a peach, they are ready to blend into a silky purée.
Instructions
- Blend the watermelon base:
- Toss the watermelon cubes, lime juice, and sweetener into the blender and purée until you see a perfectly smooth, bubblegum pink liquid with no chunks remaining.
- Fill the molds two thirds full:
- Pour the watermelon purée evenly into your popsicle molds and give each one a gentle tap on the counter to coax stubborn air bubbles up to the surface.
- Give the first layer a head start:
- Slide the molds into the freezer for about one hour until the surface feels firm enough to support another layer without the two bleeding together.
- Blend the kiwi layer:
- While the watermelon sets, purée the kiwi slices with lime juice and sweetener until the mixture turns a bright, speckled green that smells like the tropics.
- Add the green topping:
- Pour the kiwi purée over the firm watermelon layer, filling each mold almost to the brim, then insert the popsicle sticks straight into the center.
- Freeze until solid:
- Return the molds to the freezer for at least three hours, or until you press the surface gently and feel absolutely no give.
- Release with warmth:
- Run the outside of each mold under warm water for a few seconds, then ease the pop out with a gentle, steady pull.
 Pin it
 A friend who swore off anything healthy tasting told me these changed her mind about fruit based desserts entirely. She now makes them with her daughter every weekend and sends me photos of new flavor combinations I never would have considered.
Variations Worth Trying
Thin mint leaves chopped into the watermelon purée add a cool, almost mojito like quality that caught me off guard the first time I tried it at a barbecue.
Getting the Layers Right
Pressing thin kiwi slices against the inside walls of each mold before pouring creates a stunning stained glass look when the pops are released. This small extra step takes maybe two minutes but makes people think you spent all day on them.
Wrap any leftover pops individually in parchment paper and store them in a freezer bag to prevent ice crystals from forming over time. They keep well for up to two weeks, though in my experience they vanish long before that.
- Maple syrup works as a lovely substitute for agave if that is what your pantry offers.
- Stirring in tiny diced fruit pieces before freezing gives each bite a pleasant, chewy surprise.
- Always double check syrup labels if you are serving these to anyone with dietary restrictions or allergies.
 Pin it
 Some recipes are about comfort and some are about joy, but these pops are simply about making the hottest days a little more bearable. Keep a batch in your freezer all summer and you will never regret opening the door to one.
Recipe Questions & Answers
- → How long do these frozen treats keep?
-
These layered pops will stay fresh in the freezer for up to 3 months when stored in airtight molds or transferred to freezer bags. For best texture and flavor, enjoy within the first month.
- → Can I make these without a blender?
-
Yes, you can use a food processor or immersion blender instead. Mash the fruit thoroughly with a fork for a chunkier texture, or press through a fine mesh sieve for a smoother consistency without equipment.
- → What other fruit combinations work well?
-
Try strawberry-mango, blueberry-raspberry, pineapple-coconut, or peach-berry layers. Any combination of sweet and tart fruits creates beautiful contrasting layers and balanced flavors.
- → Do I need to add sweetener?
-
The natural sweetness from ripe watermelon and kiwi is often enough. Add sweetener gradually and taste as you blend, adjusting based on fruit ripeness and your personal preference.
- → How do I prevent the layers from mixing?
-
Freeze the first layer for at least 1 hour until firm to the touch before adding the second layer. Pour the top layer gently over a spoon to minimize disturbance, and insert sticks carefully.
- → Can I use fresh fruit chunks instead of purée?
-
Yes, mix small diced fruit into the purée before freezing for added texture. You can also place thin kiwi slices against the mold walls before pouring for a decorative visual effect.