 Pin it
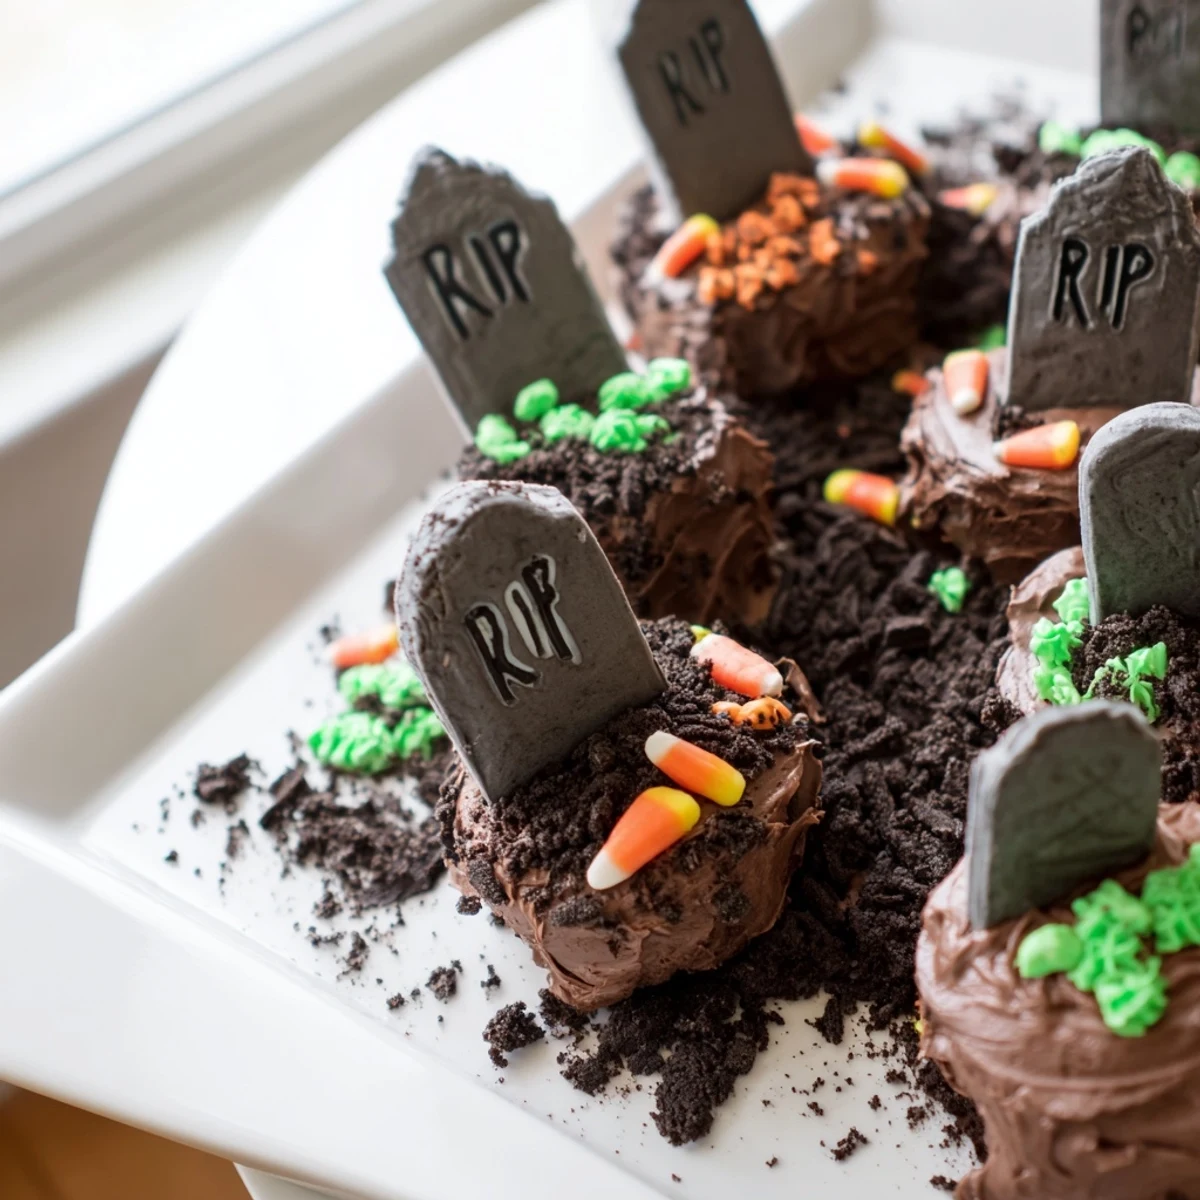
 These festive graveyard cupcakes bring Halloween spirit to your dessert table. Start with moist vanilla cupcakes topped with rich chocolate frosting, then create a spooky cemetery scene using crushed chocolate cookies as dirt and decorated rectangular cookies as tombstones. The pull-apart format makes serving easy at parties, while the interactive decorating process offers fun for all ages.
The year my daughter turned eight, she declared our house needed to be the spookiest on the block. We spent three weeks transforming the front yard into a cemetery scene, and I wanted something that would tie into that theme for her class party. These graveyard cupcakes became the centerpiece, and watching twenty third graders gasp at the edible tombstones before devolving into delighted giggles is now one of my favorite Halloween memories.
Last October, my neighbor texted me at 9 pm in a mild panic. She had forgotten she promised treats for her office Halloween potluck the next morning. I walked over with a batch of these already assembled, and she told me later that people were actually taking photos of them before eating. The best part was that she felt like the most prepared person there, despite the last minute save.
Ingredients
- 1 ½ cups (180 g) all-purpose flour: The foundation of our cake base, measure by weight for most consistent results
- 1 cup (200 g) granulated sugar: Creates tender crumb and helps the cupcakes rise beautifully
- ½ cup (115 g) unsalted butter, softened: Room temperature butter incorporates properly for the perfect texture
- ½ cup (120 ml) whole milk: Adds moisture and richness, though any milk works in a pinch
- 2 large eggs: Bring these to room temperature too for better emulsification with the butter
- 2 tsp baking powder: The leavening agent that gives these cupcakes their lift
- 1 tsp vanilla extract: Pure extract makes a noticeable difference in the final flavor
- ¼ tsp salt: Balances sweetness and enhances all other flavors
- 1 cup (230 g) unsalted butter, softened: For the frosting, this amount might seem generous but it creates that silky smooth texture
- 2 ½ cups (300 g) powdered sugar: Sift this first to avoid any lumpy surprises in your frosting
- ½ cup (40 g) unsweetened cocoa powder: Dutch process gives the deepest, darkest chocolate flavor
- 2-3 tbsp (30–45 ml) milk: Start with 2 tablespoons and add more only if needed for piping consistency
- 1 tsp vanilla extract: Dont skip this in the frosting, it rounds out the chocolate perfectly
- Pinch of salt: Just enough to make the chocolate sing without tasting salty
- 6–8 chocolate sandwich cookies: Classic sandwich cookies crush beautifully into realistic dirt
- 6–8 rectangular cookies or biscuits: Look for rectangular shortbread or vanilla wafers for sturdiest tombstones
- Black, white, and green gel icing pens: Gel pens write more cleanly than liquid icing on cookies
- Gummy worms, candy pumpkins, or Halloween themed candies: The finishing touches that make kids eyes light up
Instructions
- Preheat your workspace:
- Set your oven to 350°F (175°C) and line a 12 cup muffin tin with liners. This prep step makes everything else flow smoothly.
- Make the cake batter:
- In a large bowl, cream butter and sugar until light and fluffy. Beat in eggs one at a time, then vanilla. In a separate bowl, whisk flour, baking powder, and salt. Add half of the dry mixture to the wet, then add milk, then mix in remaining dry ingredients until just combined.
- Bake to perfection:
- Divide batter evenly among liners, filling each 2/3 full. Bake for 18–20 minutes, or until a toothpick inserted comes out clean. Cool cupcakes completely on a wire rack before frosting.
- Prepare the chocolate frosting:
- Beat butter until creamy. Add powdered sugar and cocoa powder, mixing slowly at first to avoid a mess. Add vanilla and milk, beating until smooth and spreadable.
- Create the graveyard base:
- Arrange cooled cupcakes close together on a serving tray in a rectangle or mound shape. Generously spread chocolate frosting over all cupcakes, creating one smooth surface so they look like a single cake.
- Add the spooky details:
- Crush chocolate sandwich cookies and sprinkle over the frosting for dirt. Write RIP and spooky messages on rectangular cookies with gel icing pens to make tombstones, then press into the cupcakes.
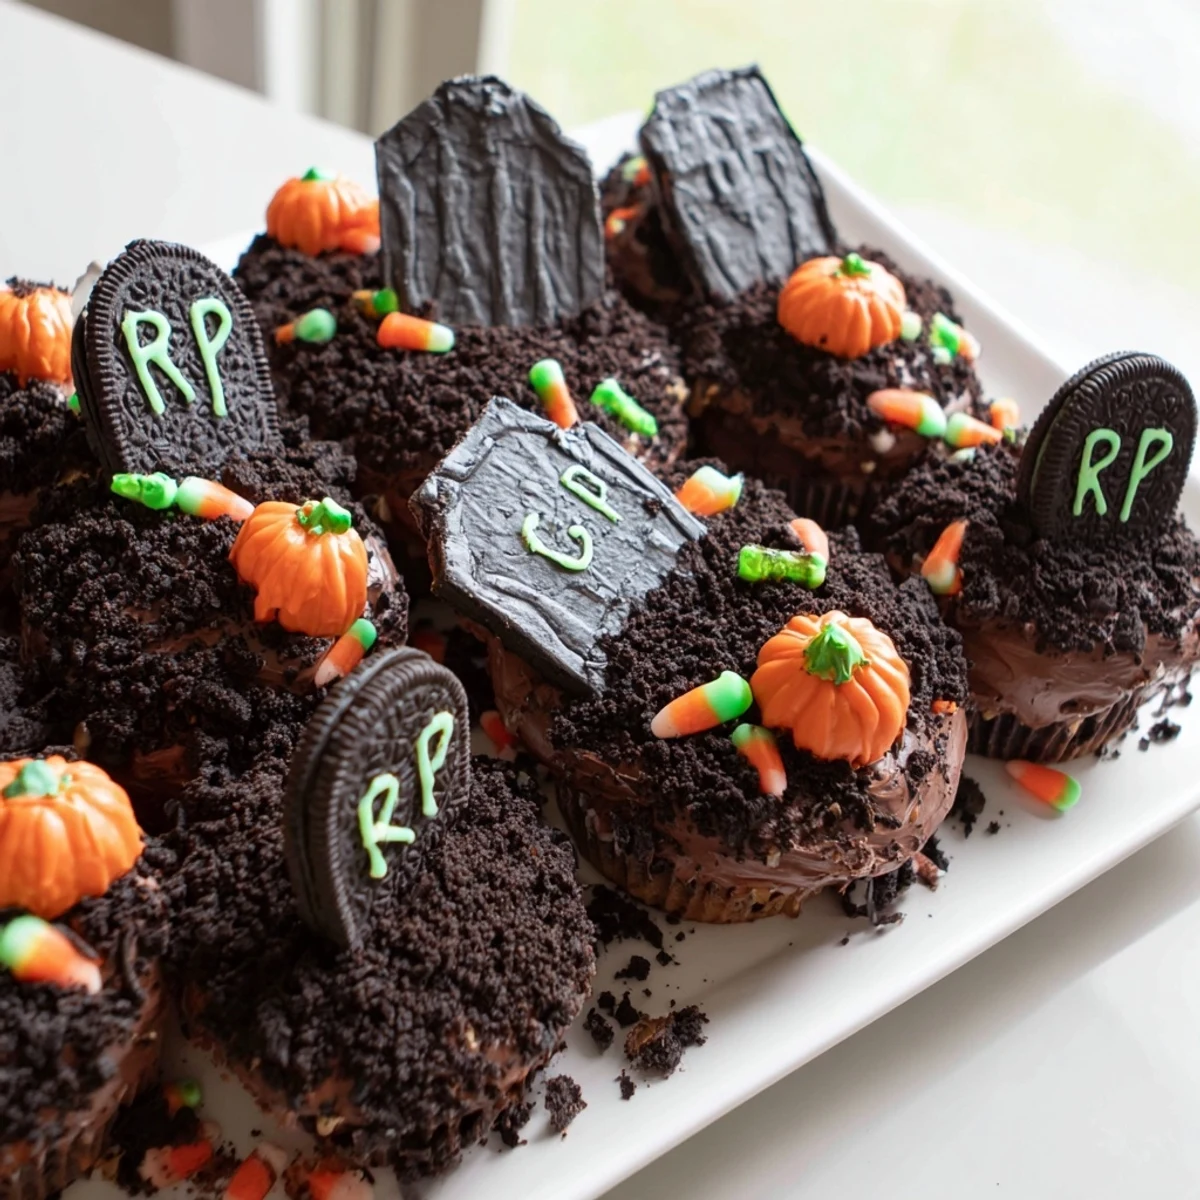
- Final touches:
- Decorate with gummy worms, candy pumpkins, or any Halloween candy that strikes your fancy. Chill briefly before serving to set everything in place.
 Pin it
 My teenage son, who is too cool for everything, actually got excited about helping with these. He spent twenty minutes coming up with punny tombstone messages and was genuinely proud of his zombie hand cake decoration. Sometimes the best memories come from the moments you least expect.
Making Ahead Like a Pro
I learned the hard way that frosted cupcakes do not freeze well. However, you can bake and freeze the undecorated cupcakes up to a month in advance. Thaw them overnight in the refrigerator, then bring to room temperature before frosting and decorating. The frosting can also be made ahead and stored in the refrigerator for up to a week, just let it come to room temperature and give it a quick stir before using.
Getting the Dirt Just Right
After my first attempt where the dirt looked like neat little crumbs instead of authentic graveyard soil, I changed my technique. Now I crush the cookies directly inside a sealed bag using a rolling pin, aiming for varied sizes from fine dust to larger pebbles. This creates that realistic uneven texture that makes people hesitate before taking a bite. Some years I even mix in a bit of crushed chocolate graham crackers for lighter colored soil variation.
Creative Tombstone Ideas
Over the years, we have moved way beyond simple RIP messages. My favorites have been puns like Here Lies the Leftovers, Witch Way to the Candy, and actual names of family members who got a kick out of finding their edible tombstone. The kids especially love drawing cracks, spiderwebs, or even little ghosts on the stones with the gel pens.
- Write messages the night before so the gel has time to set completely
- Keep rectangular cookies upright by pressing them slightly into the frosting at an angle
- Have extra cookies on hand in case of breakage during decorating
 Pin it
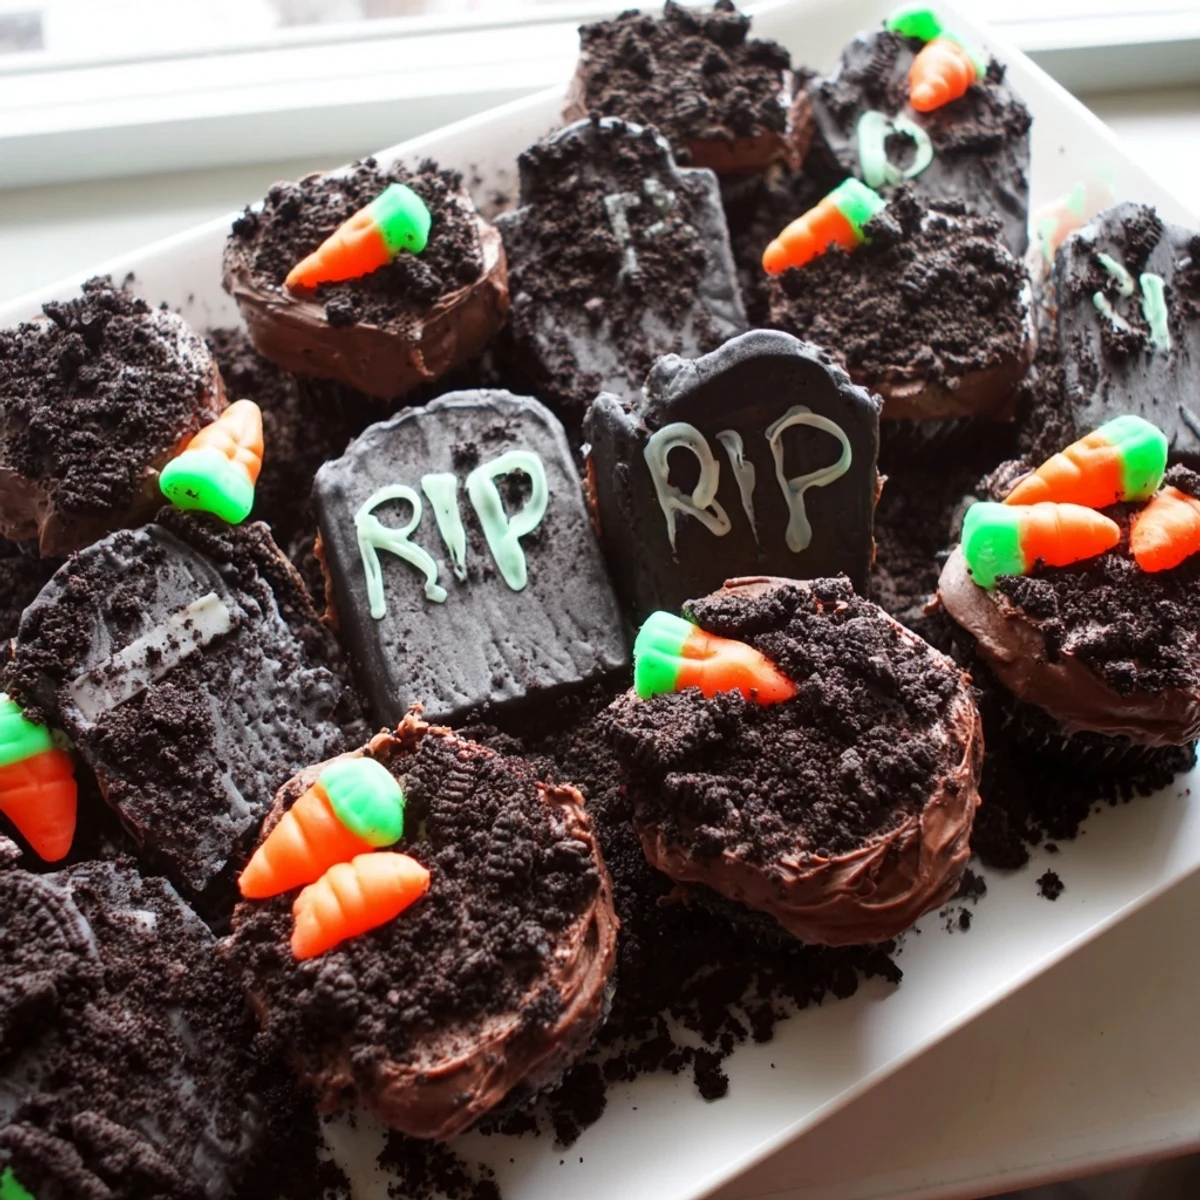
 These have become our signature Halloween treat, requested by friends and family weeks in advance. There is something magical about how a little chocolate frosting and crushed cookies can transform ordinary cupcakes into a conversation piece that brings everyone together.
Recipe Questions & Answers
- → How far ahead can I make these graveyard cupcakes?
-
Prepare cupcakes and frost them up to 24 hours before serving. Add cookie decorations and tombstones within 4-6 hours of serving to prevent them from becoming soft from the frosting moisture.
- → What cookies work best for the tombstones?
-
Rectangular shortbread cookies, vanilla wafers, or graham crackers cut into rectangles work perfectly. Choose sturdy cookies that won't crumble when pressed into the frosting.
- → Can I use store-bought cupcakes to save time?
-
Absolutely. Store-bought cupcakes work well for this project. Just ensure you have enough chocolate frosting to cover them completely when arranged in your graveyard formation.
- → How do I transport these without damaging the decorations?
-
Use a flat, sturdy tray with sides. Assemble the graveyard at your destination if possible, or transport carefully with the tray placed on a flat surface in your vehicle.
- → What other decorations can I add?
-
Candy bones, skull-shaped candies, pretzel sticks as fences, chocolate rocks, or plastic spider rings make excellent additions. Pipe green gel frosting for grass or spooky vines.
- → Can these be made gluten-free?
-
Yes. Use gluten-free flour blend for the cupcakes and ensure all cookies and decorations are certified gluten-free. Many brands offer gluten-free chocolate sandwich cookies and suitable tombstone alternatives.